
The evolution of applications development methods towards the Cloud are the real driving force that leads the creation of new generation services that are encapsulated into software structures called containers.
As we saw in the last article, Photon, Docker and containers represent the architectural objects that were born from a revolution in the way of developing cloud-native applications.
After analyzing shortly the matter from a systems perspective, it’s now the time to focus from a “DevOps” point of view, that is, starting with the creation of container images and concluding with their execution.
Developing in the “Datacenter-in-a-box” Continuing from where we interrupted, the Docker engine working environment, which runs inside of a Photon system, becomes the development or service infrastructure depending on the available physical and virtual infrastructures. When developing, it’s enough to have a Photon instance running on your own workstation by means of a type-1 hypervisor; VMware, in addition to the classic Workstation and Fusion products, released App Catalyst (https://www.vmware.com/cloudnative/appcatalyst-download), a free version of its virtualization engine but without a graphical interface.
Albeit being minimal, AppCatalyst has some interesting features in terms of management and automation. In a post on his blog, William Lam describes an example use of Vagrant. This integration has been made available thanks to a plugin written by Fabio Rapposelli, member of VMware’s CNA team (https://github.com/vmware/vagrant-vmware-appcatalyst).
From the image to the container
Let’s now build the image of our first container, that is, the recipe to define the essential elements of the resulting environment like:
- Operating System;
- libraries and additional integration “tools”;
- the application itself;
- the execution mode.
FROM ubuntu:trusty
MAINTAINER Lino Telera Linoproject.net <This email address is being protected from spambots. You need JavaScript enabled to view it.>
# Install base packages
RUN apt-get update && \
DEBIAN_FRONTEND=noninteractive apt-get -yq install \
python \
python-pip python-dev build-essential \
openssh-server \
libffi-dev libssl-dev \
git
RUN pip install --upgrade pip
RUN pip install --upgrade virtualenv
RUN pip install requests[security]
RUN pip install pyopenssl ndg-httpsclient pyasn1
## Working directory
RUN mkdir /opt/services
WORKDIR /opt/services/
RUN easy_install web.py
EXPOSE 443
ADD ws.py /opt/services/ws.py
CMD ["python", "/opt/services/ws.py","80"]
Defining a Dockerfile is an easy operation as it reflects the actions of the configuration of an operating system. After choosing the basis image (defined by the FROM syntax), in our case the image of Ubuntu-14.04, you just need to add the application components needed to the functioning of the service (defined with the RUN component). Moreover, you can specify some typical configurations, like working folder (WORKSPACE) and the communication ports with the external world (EXPOSE).
The application itself will be positioned inside the directory where the Dockerfile resides and with the ADD instruction it’s possible to add local files directly into the image itself; alternatively you can use systems like “git” or “curl” to add applications developed inside a personal repository or by third parties. Lastly, there’s a method largely used by developers to share a Photon directory with one inside the container, thus allowing to develop inside the executing container, without having to repeat the image construction phases. For more information about the sintax of a Docker image, please refer to the official Docker guide at the Dockerfile Reference section (https://docs.docker.com/engine/reference/builder/).
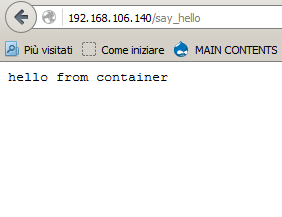
Speaking about applications, the aforementioned example requires a Python file that, using dedicated libraries, generates a “webservice” replying with “hello from container” to the call on port 80:
#!/usr/bin/env python
import web
urls = (
'/say_hello', 'say_hello'
)
app = web.application(urls, globals())
class say_hello:
def GET(self):
return "hello from container"
if __name__ == "__main__":
app.run()
Build and Run

With a couple simple commands you can build the image, the list of available images in the local system and, finally, the execution of the first container:
This way of working, apparently onerous in the developers world, allows to free the application from the underlying system thus making specific the execution environment, but dramatically increasing portability.
As a matter of fact:
Eliminating infrastructural dependences is the real added value of developing with containers.
At this point the possibility of building a scalable model pops up: with the same image you can build one or more containers similar in business logic, making the application reactive to the workload. Using manual or automated interactions with the container engine you can also reserve or free computational resources in a dynamic manner simply starting or stopping containers.
Another characteristic of Docker and containers images is the “fork” approach, that is, the opportunity of building new images from the ones already available locally or in a private or public “hub”. Indeed if a group of different applications need of the same execution environment you can use an image that is already available, only making small changes and deriving other images..
Lastly, to distribute Docker images, so applications, in addition to the famous GitHub, you can use Docker Hub (https://hub.docker.com) or private and third-party Hubs. Specifically, the aforementioned example is available at Docker Hub at the address (https://hub.docker.com/r/linoproject/ws1/); therefore from your Photon instance you can run the container called “linoproject\ws1” using only the “run” command, without having to repeat the image building phases:
docker run -d -p 80:80 --name ws1 linoproject/ws1
The local system, as it can’t find the image, will download it directly from the Docker Hub..
Container control
Docker, like the other Container management platforms, is a system that allows to remotely interact with its own “command line interface” or third-party tools: to enable remote control you need to modify the configuration file as it follows:
# Docker Upstart and SysVinit configuration file
# Customize location of Docker binary (especially for development testing).
#DOCKER="/usr/local/bin/docker"
# Use DOCKER_OPTS to modify the daemon startup options.
#DOCKER_OPTS="--dns 8.8.8.8 --dns 8.8.4.4"
DOCKER_OPTS="-D --tls=true --tlscert=/var/docker/server.pem --tlskey=/var/docker/serverkey.pem -H tcp://192.168.106.130:2376"
# If you need Docker to use an HTTP proxy, it can also be specified here.
#export http_proxy="http://127.0.0.1:3128/"
# This is also a handy place to tweak where Docker's temporary files go.
#export TMPDIR="/mnt/bigdrive/docker-tmp"
This modification implies the restart of the docker-engine and the power-off of the instances.
Coming up next
We have seen how a simple workstation can transform into a small datacenter capable of developing and executing Cloud-native applications. In the next article we’ll focus on the matter from an infrastructure perspective, dealing with Photon Controller and the vSphere release dedicated to Cloud-native applications called vSphere Integrated Container.